Cryx Revenant Unit

|
Rules subject to change.
This is an existing model/theme, but it is being updated.
This model is part of the current CID cycle (What is CID?) and the information shown below does not represent its final rules.
This is a existing model/theme, and the information here is the rules it had before the CID cycle.
If you wish to document the CID changes before they're finalised, please do so under the Recent Changes heading only.
|
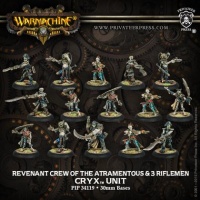
Deathbound to the Dragon King, the infamous blackship Atramentous and her revenant crew are the scourge of the Broken Coast. The revenants die a thousand deaths in service of the Dragonfather, for Lord Toruk grants them the necromantic power to rise again and the strength to destroy their enemies.
Rifleman - Weapon Attachment
When the time comes for the revenants to make their final assault, the riflemen accompany them, jumping over the bow or through an island fort's gates.
Basic Info
| Revenants
|
|
| SPD
|
6
|
| MAT |
5
|
| RAT |
4
|
| DEF |
13
|
| ARM |
12
|
| CMD |
7
|
| Cost |
9/16, +2 for each WA
|
1.7 per model
|
| Unit Size
|
6/10, plus up to 3 WA
Template:SBE
|
Weapons and Attacks
- Revenants
- Pistol - 8" range, POW 10 gun
- Cutlass - 0.5" reach, P+S 9 melee weapon
- Riflemen
- Long rifle - 14" range, POW 10 gun
- Ghost Shot - This model ignores LOS, concealment, and cover when making attacks with this weapon.
- Cutlass - 0.5" reach, P+S 9 melee weapon
Special Abilities
- Entire unit
-
 Undead
- Deathbound - If there are fewer models in this unit in play during your Maintenance Phase than there were at the start of the game, you can return to play d3 destroyed models to this unit. Place the returned models completely within 3" of the Leader.
- Gang - When making a melee attack targeting an enemy model in the melee range of another model in this unit, this model gains +2 to melee attack and melee damage rolls.
- Riflemen only
CID Changes
November 17
- SPD 5 and lose Point Blank
Thoughts on Revenant Crew of the Atramentous
Notable changes from Mk2
Deathbound changed to be d3 instead of "everyone"
Revenant Crew of the Atramentous in a nutshell
They're a tarpit unit with bad-to-average shooting and melee capabilities.
Thoughts on adding the WA
The WA is in a weird place. He wants to sit back and shoot, but the main unit wants to run forward to get in melee and get the most out of Point Blank.
If you're going to take WA, you should probably take min-sized units with max WA.
Max or Min?
| Ler's compare ... |
3x Min units |
2x Max units
|
| Total Revenants |
18 |
20
|
| Total Points Cost |
27 |
32
|
| Points Per Model |
1.5 |
1.6
|
| Regeneration per turn |
3d3
6 on average |
2d3
4 on average
|
| Adding the WA |
Can get 9 WA
Total cost = 45
Points Per Model = 1.67 |
Can get 6 WA
Total cost = 44
Points Per Model = 1.69
|
| Less Quantifiable Stuff
|
- If your opponenet can easily remove 6 models per turn, but would struggle to kill 10, then the Min-Size unit is worse off. Because they'll kill all 6, no more Leader, and Deathbound stops regardless if you have WA or not (see below).
- If you have a unit-wide buff then the Min-Size unit is worse off. Because the spell will only affect 6 models instead of 10.
|
So, like most things in Warmachine, a simple decision in theory (min units are cheaper per model = better) but a tough one in practice (min units are more fragile).
My advice is to field test it both ways, until you figure out which strategy works best for you.
Combos & Synergies
Drawbacks & Downsides
- Due to the way Field Promotion and Deathbound are worded and interact, your opponent can negate Deathbound for the entire game by using a Remove From Play ability on the Leader model.
Tricks & Tips
- Keep one Grunt really far back, so he can get field promoted when the rest of the unit dies.
- This won't work if the Leader is RFP'd, aa described above.
- If you're using more than 1 unit, mix them together. It'll be harder for your opponent to completely wipe out one unit and/or avoid Deathbound triggering on just one unit; especially if they're using blasts/Electro Leap/etc to clear them.
Other
Trivia
- The unit (not including the WA) was originally released in Warmachine: Escalation (2004)
- The Rifleman WA was released in the Warmachine: Wrath expansion (2011)
- Sculptor (Quatermaster): Kev White
- Sculptor (Grunts): Grègory Clavilier
Theme forces
Other Cryx models
Rules Clarifications

|
Rules Clarification : Ghost Shot (Edit)
- Ignore LOS (Edit)
- Since you ignore LOS, you can target models in your back arc. (Infernal Ruling)
- Although you ignore concealment/cover, you don't ignore any other bonuses models get "from" them (such as Prowl).
- You don't ignore Stealth's "auto-miss" rule.
|
Rules Clarification : Undead - None yet. (Edit)
|
|
Rules Clarification : Deathbound (Edit)
- Your opponent can negate Deathbound for the entire game by using a Remove From Play ability vs the Leader model.
- Because Deathbound makes you place models near the Leader, not the unit commander; (Infernal Ruling); and because Field Promotion only occurs when a Leader is destroyed, but not when they're Removed From Play.
- It results in you trying to place models near a model that is not on the table.
- Deathbound + Death Toll
- This is a bit of a weird one, and easiest to explain with an example. Say you start with a unit of 10 models, then add 2 via Death Toll.
- 1 model is destroyed, leaving you at 11. You don't have "fewer models in the unit than there were at the start of the game" so Deathbound doesn't trigger.
- Another model is destroyed, leaving you at 10. Deathbound still doesn't trigger.
- Another model is destroyed, leaving you at 9. Now Deathbound triggers.
- Here's the weird part: once it is triggered it no longer cares what the starting unit size was, only how many destroyed models are available to be returned to play. So if you roll a 3 then you get all 3 destroyed models back, and you're back to 12 total.
|
|
|
Rules Clarification : Gang and/or Gang Fighter and/or Tag Team and/or Team Effort (Edit)
- You can gain the Gang bonus on free strikes, but generally only the first "Ganger" will get it.
- For example, if a target is engaged by two models with Gang, when it leaves the melee range of the first Ganger it suffers a free strike with the Gang bonus. Then it leaves the melee range of the second and suffers a normal free strike.
|
|
|
Rules Clarification : Point-Blank (Edit)
- Number of attacks
- Point-Blank gives you an extra initial melee attack (even though, RAW, it doesn't meet the criteria). (Infernal Ruling)
- If you can make additional melee attacks, these can be Point-Blank attacks regardless of the weapon's ROF. (Locked Thread)
- If you have the option of choosing between ranged or melee attacks (for instance you combined Point-Blank with Gunfighter), then you need to declare whether you're making melee or ranged attacks this activation, then declare the weapon and the target. (Infernal Ruling)
- AOE
- Point-Blank AOEs work just fine, because the AOE template isn't tied to the range.
- You make a melee attack roll then if you hit you centre the AOE template, or you miss and deviate the AOE template (it can only deviate 0.25").
- If you have a buff to melee damage rolls (such as Flaming Fists) then it will affect the blast damage rolls too.
- Sprays
- Point-Blank sprays don't really work. The spray template is intrinsically linked to the attack's range, and Point-Blank overwrites the range.
- You still get one attack tho - you make the melee attack roll, then go straight to the melee damage roll. You never put the spray template down.
- Other
- Since Point-Blank only works during your activation, you can't use it on free strikes or other out-of-activation melee attacks.
- Gunfighter vs Point Blank (Edit)
- If a model has both Gunfighter and Point Blank, then you should declare whether you're using it as a ranged attack or melee attack whenever you shoot the gun. Because that can limit what other initial/additional attacks you can make. (Infernal Ruling)
- These two abilities are subtly different, but it's an important difference.
- Gunfighter allows you to make ranged attacks while in melee.
- Point blank allows you to make melee attacks with your ranged weapon.
- Since you can't make both ranged and melee attacks in the same turn, a Gunfighter model has a choice of either initial melee attack(s) or initial ranged attack(s). (unless it has Virtuoso or something).
- Whereas a Point Blank model chooses to make initial melee attacks, and then gets to make attacks with both weapons.
- Furthermore, the types of bonuses, penalties, and special effects you (or your opponent) can trigger will change dramatically:
- Any buffs/triggers on ranged attacks (such as Evasive, Shield Guard, Deadeye, etc) will affect Gunfighter attacks, but not Point Blank attacks.
- Any buffs/triggers on melee attacks (such as Battle Lust, Riposte etc) will affect Point Blank attacks, but not Gunfighter attacks.
|
|
|
Rules Clarification : Combined Ranged Attack (Edit)
- CRA cannot target models in melee ... unless the target is a huge-based model or the attacker has War-Tempered.
- If you give the attack-leader a buff to their attack (such as Guidance) then that buff applies to the combined attack (even though the other participants don't have the buff). (Locked thread)
- Assault & CRA (Edit)
- You cannot mix Combined Range Attacks with Assault shots, as CRA works during your combat action and Assault shots occur before it. (Infernal Ruling)
|

|
Note to Editors
To edit the WA's tagged abilities, Click here
|


